Quickstart
Build with the Respan MCP
We recommend installing the Respan MCP so your AI coding tool can work with your prompts, logs, and traces directly. Authenticate with your Respan API key from the API keys page:
See the MCP docs for OAuth setup and other clients.
What is prompt management?
Prompt management lets you create, version, and deploy prompt templates centrally instead of hardcoding prompts in your application. Simply reference them by ID.
Prerequisites
Before you begin, make sure you have:
-
Respan API key: get one from the API keys page. See API keys for details.
-
Credits: add credits on the Credits page to run models through the Respan gateway. This is the recommended way to get started.
Prefer to use your own provider key?
Add your provider credentials (e.g. OpenAI) on the Providers page instead. See LLM provider keys for details.
Create your first prompt
Go to the Prompts page and click New prompt. Then, follow these steps to make your first prompt:
Create
Test + Deploy
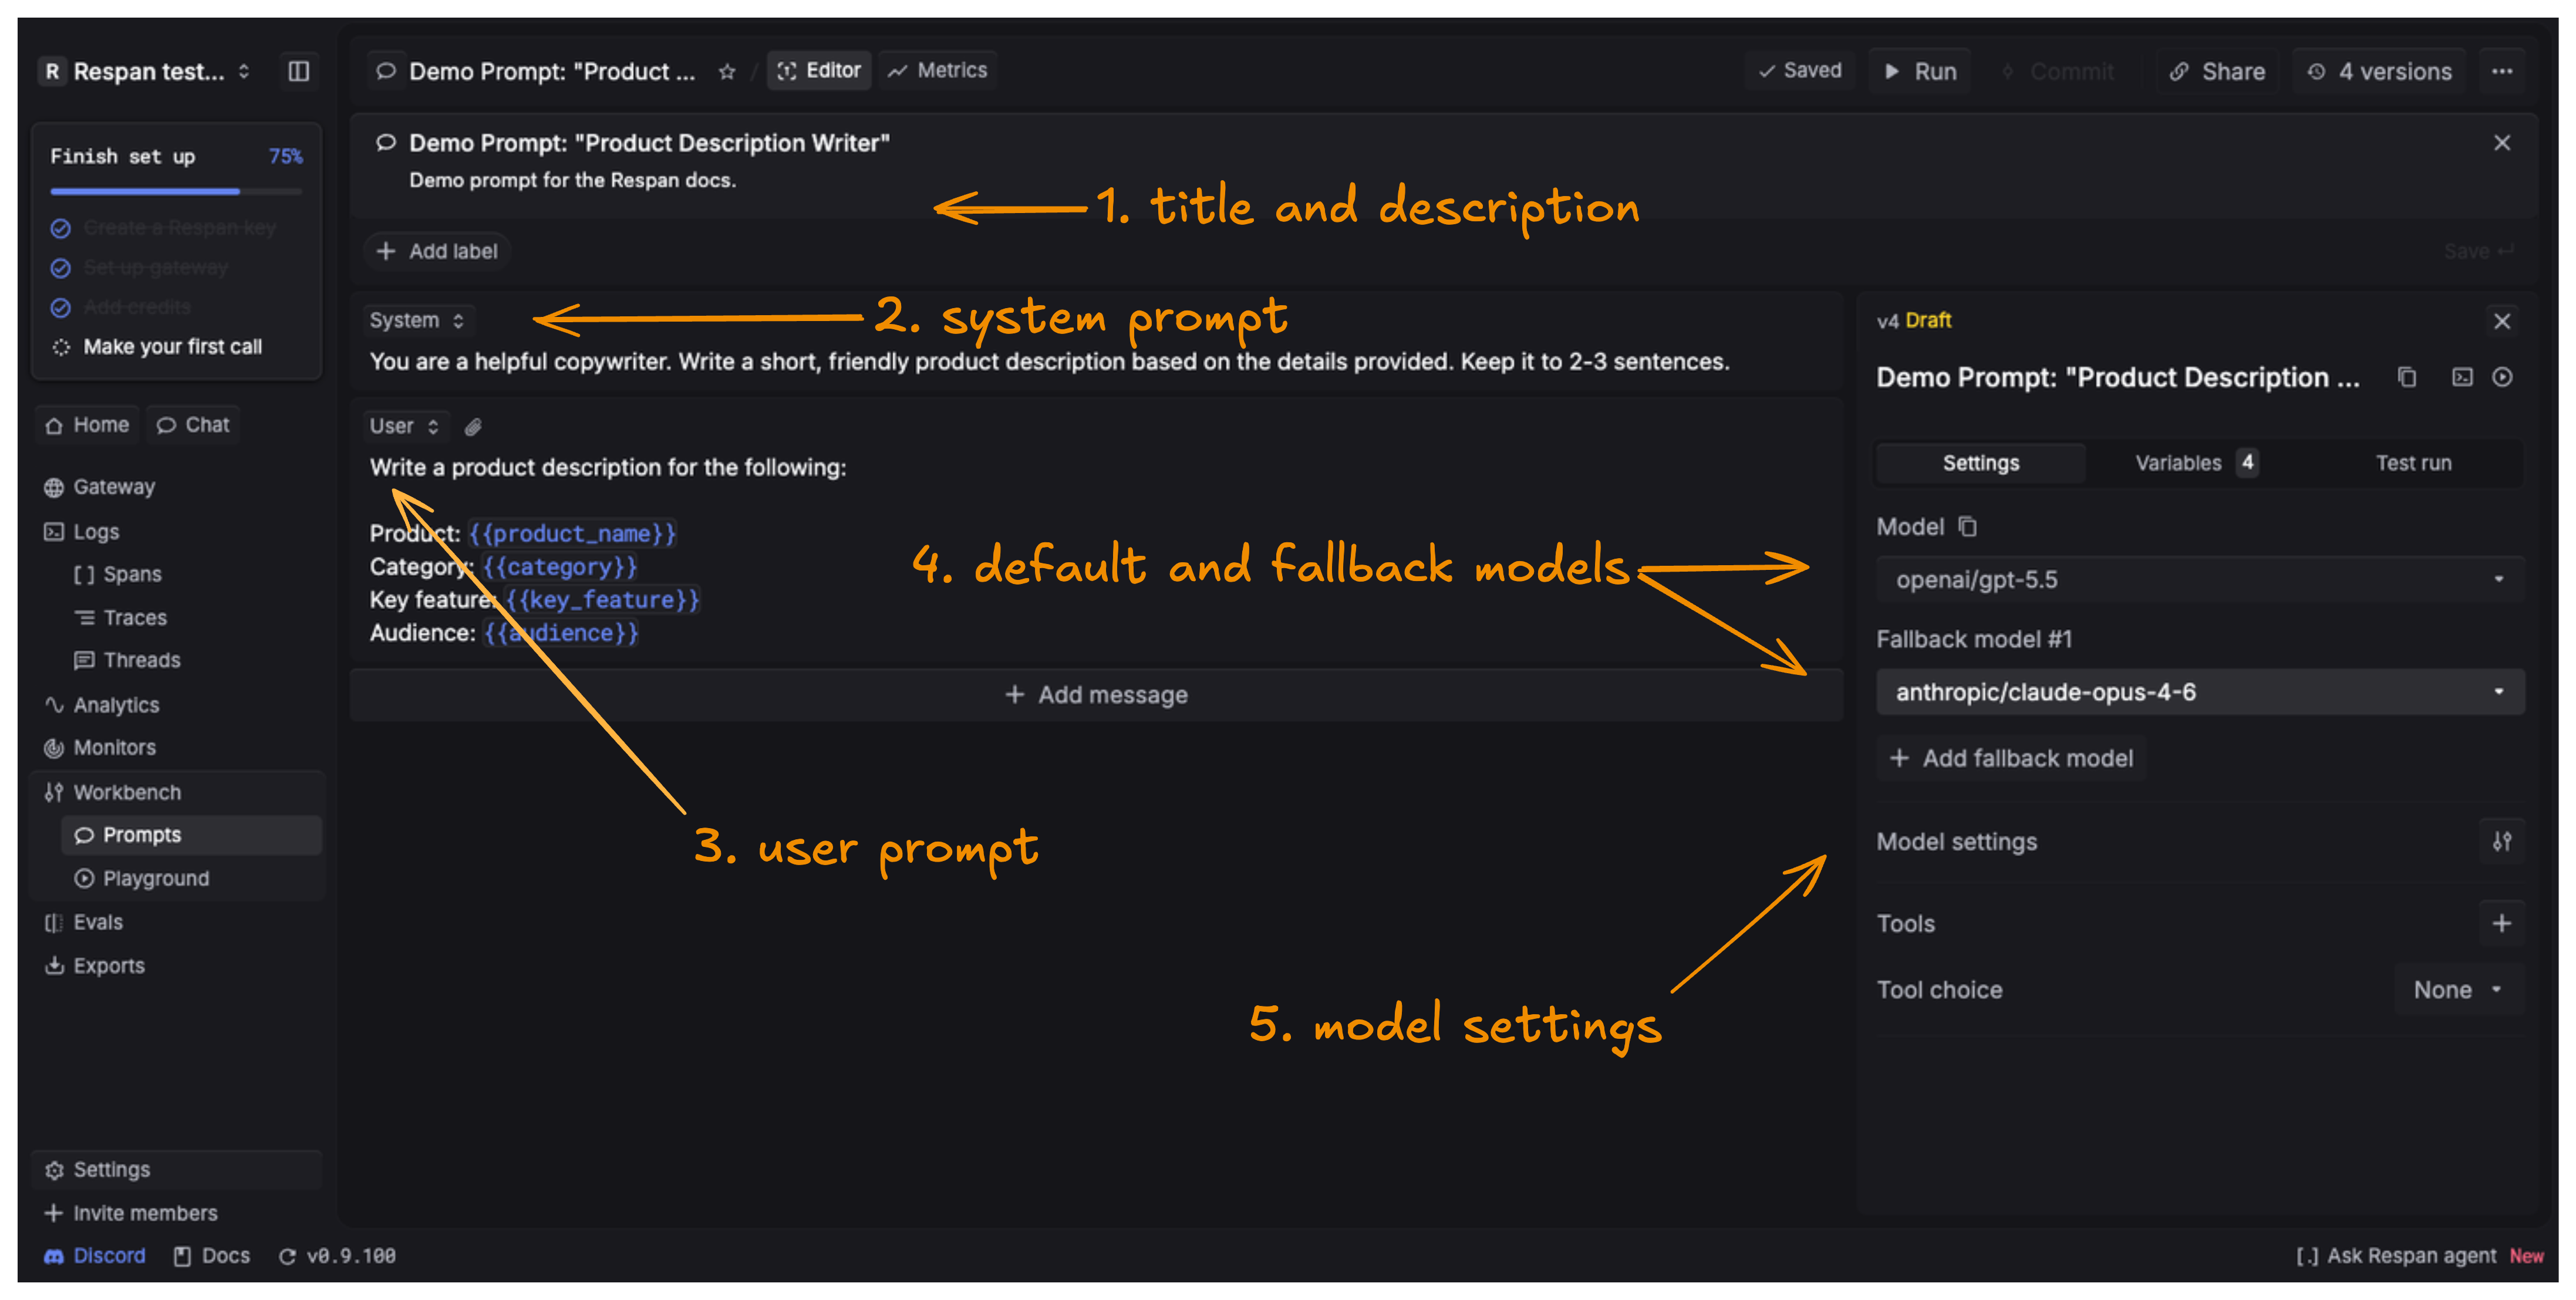
Write your system and user prompts
Add your system prompt to set the model’s role and rules, then add your user prompt containing the specific query or command.
Use {{variable_name}} for dynamic content. For prompt schema and merge behavior, see Advanced features.
Select your default and fallback models
Choose the default model to run your prompt, and add any fallback models to retry with if the primary one fails.
Adjust model settings
Set temperature, max output tokens, top P, and more in the right sidebar.
To avoid this, toggle the unsupported setting off or set it to 0.
Add variable values and test
In the Variables tab, add values for each variable you created, then click Run to test your prompt using those values.
Commit and deploy
Click Commit and write a message to save this version.
Once you commit, you can Deploy to push the version into production.
Use your prompt in code
Call your prompt from your application with the OpenAI SDK using prompt schema v1. Point the client at the Respan gateway and set override: true so your saved prompt configuration (model, messages, and settings) wins over the placeholder model and messages the SDK requires.
For more, see Prompt composition, Structured output, and Tool calling. For schema details (v1 vs v2), deployment, streaming, and logging, see Advanced features.
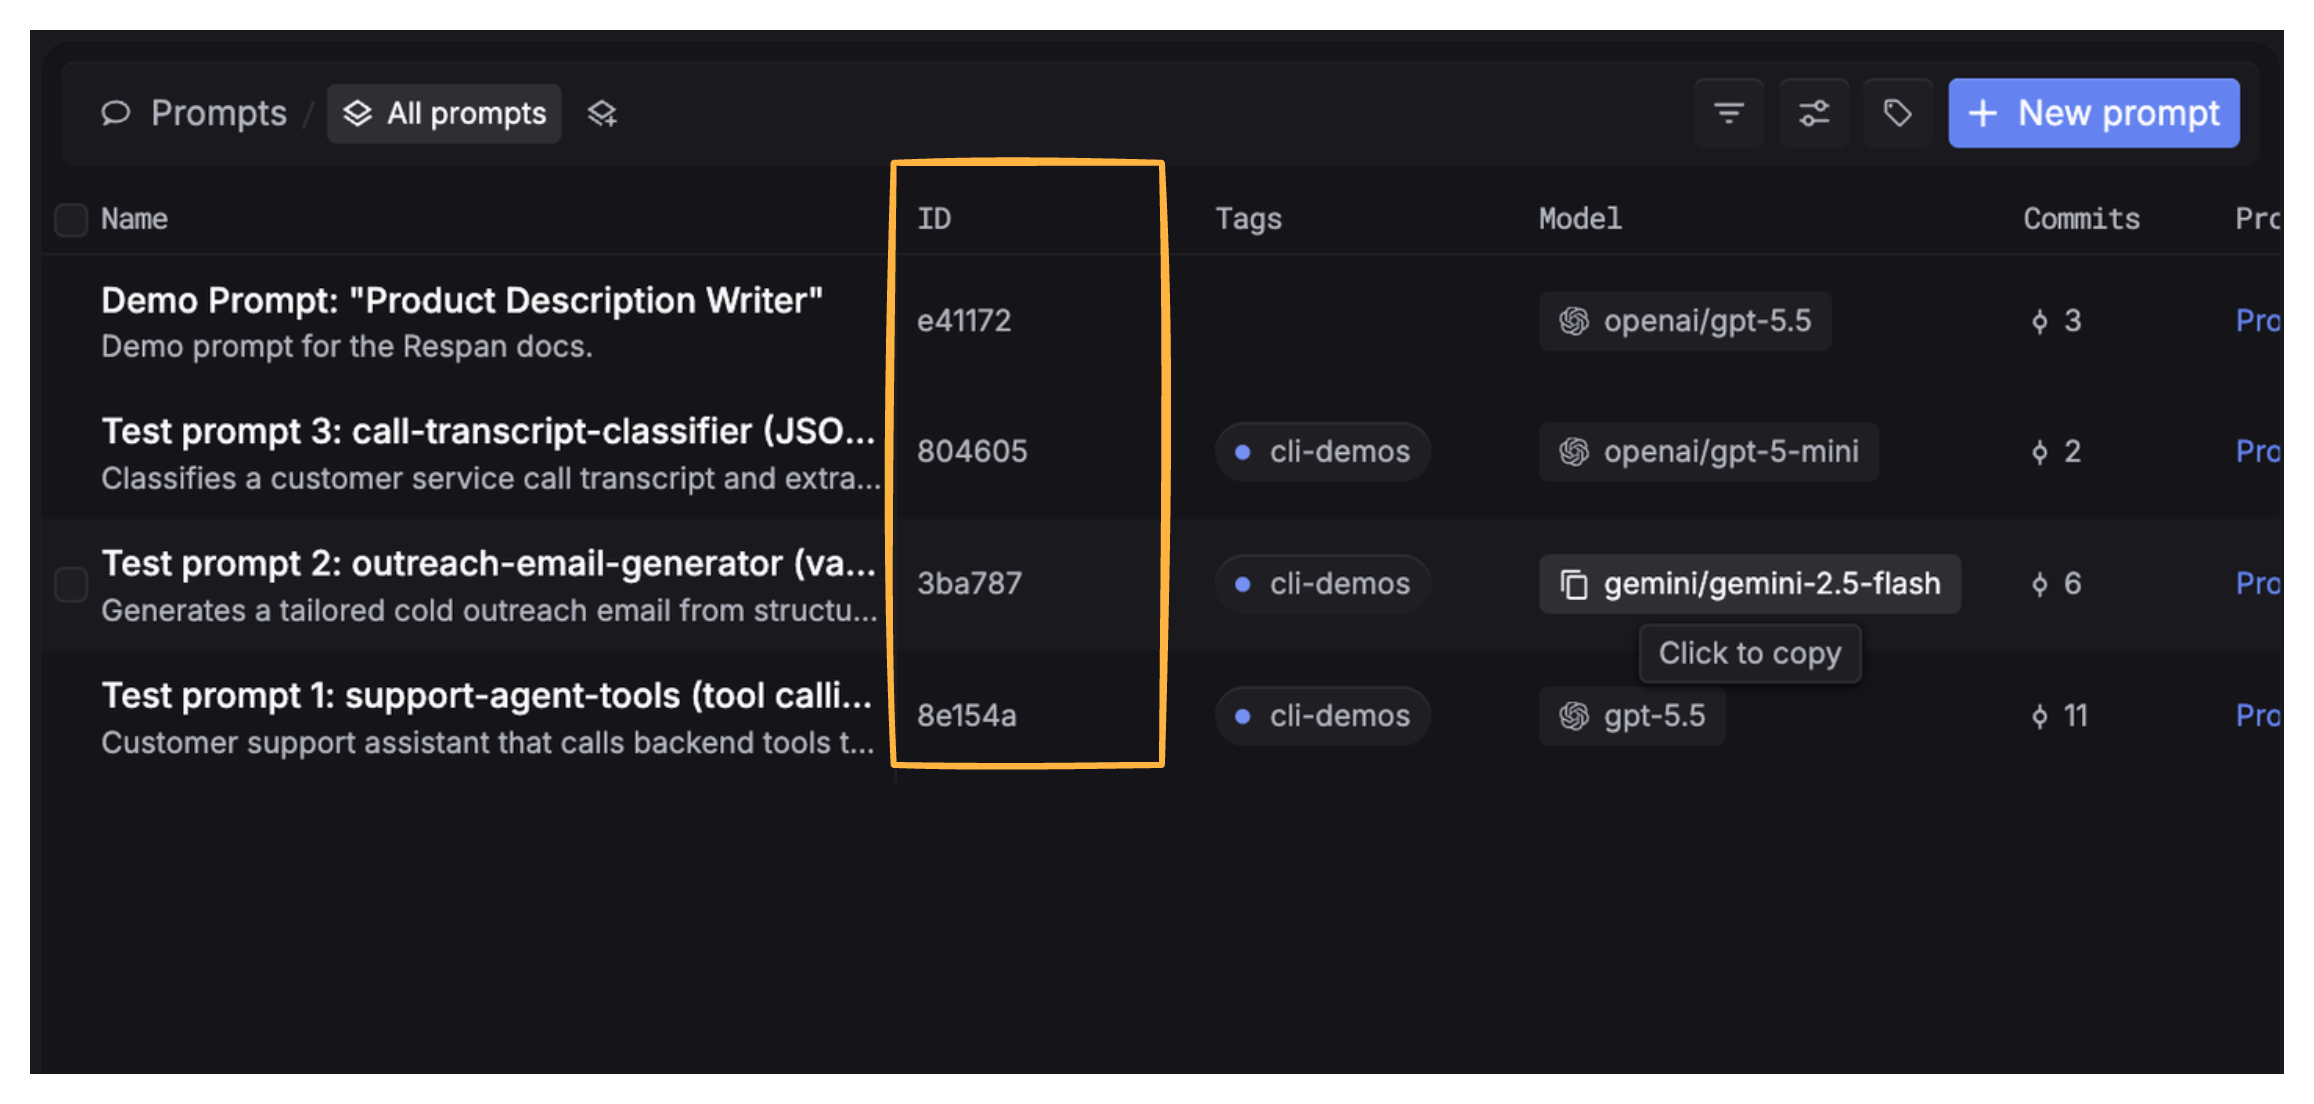
Find your prompt ID
Now that you made your own prompt, learn how to call it. This is how you find the prompt_id, a unique identifier for Respan prompts.
Find the Prompt ID in the Overview panel on the Prompts page.
Next steps
- Prompt composition: reference prompts inside other prompts
- Structured output: consistent response formats with JSON schema
- Tool calling: let the model call functions in your code
- Prompt schema (v1 vs v2): control how prompt config and request params are merged
- Deployment & versioning: version pinning, rollbacks, and overrides
- Streaming: enable streaming for prompt responses
- Playground: test and iterate on prompts interactively